We’d like to think that learning how to grow plumeria from cuttings is fairly simple especially if you live in Florida (probably not nearly as easy as growing plumeria in Hawai’i or parts of Southeast Asia where these plants are in abundance, but still easy enough for our kids to do given Florida’s climate). We haven’t been very meticulous when it comes to rooting plumeria cuttings. We treated all of them the same way, whether they’re the prepackaged plumeria cuttings purchased from the Honolulu International Airport (you know, the ones that had already cleared Customs), a fresh-cut plumeria cutting from The Exotic Plumeria in Seffner, Florida, or a salvaged cutting from a potted plumeria that nearly died after overwintering in our garage.
We haven’t used any rooting hormones on any of our cuttings, and we were able to root all of them using a fairly simple method which involves using supplies that we already have on hand.
Supplies Needed To Grow Plumeria From Cuttings
We only use the following supplies when rooting our plumeria cuttings:
- Plastic cup with small holes on the bottom (for drainage) + dome cover (like the ones from the coffee shop or service station–if you ever need an excuse to caffeinate, this would make a good one!)
- Any type of adhesive strip to seal the opening
- Perlite
- 1 tbsp Water
- Permanent marker (optional, to label the plastic cup with the name of the cultivar and date it was planted)
Simple enough, right?
Now for the fun part… but before we tell you how to grow plumeria from cuttings the easy way, please remember that we’re not claiming to be experts in any way as we’re quite new to this hobby ourselves. We’re simply happy to share our adventure of growing plumeria with you and hope that we can all learn from our combined experiments and experiences!
How To Grow Plumeria From Cuttings (The Easy Way)
Based on our reading / research, most people either choose to propagate plumeria through rooted cuttings or grafted plumeria. There are also those who prefer to grow plumeria from seed (like what we’ve started doing–but this takes time, and the seeds are not true-to-parent in most cases, based on what we’ve read). In this tutorial, we’ll tell you how to grow plumeria from cuttings solely based on our experience (it may or may not work for you, as outcomes seem to vary based on cultivar, location, season, etc.). If you’re adventurous and don’t mind experimenting, feel free to try our hassle-free method!
- Fill a clean plastic cup with perlite
- Add 1 tbsp water (and never water it again)
- Place plumeria cutting inside plastic cup (if the cutting is still fresh, wait at least 1-2 weeks for it to “heal” before attempting to root it)
- Place the dome cover over the cutting and secure it onto the plastic cup using adhesive strip to keep moisture out
- Using any permanent marker of your choice, note the cultivar name and date that you planted your cutting on the plastic cup
- Place the cutting in a sunny area
- Transfer cutting to 3-gallon plastic pot after roots start to develop and leaves start to grow
That’s it! It’s easy to see the root development through the plastic cups (this is why we have chosen this easy method instead of planting them directly into the soil)! Depending on the circumstances, you may see roots and leaves growing after 1 month. Once the roots and leaves start looking healthy and strong, it’s time to transfer the plumeria cutting into a 3-gallon plastic pot.

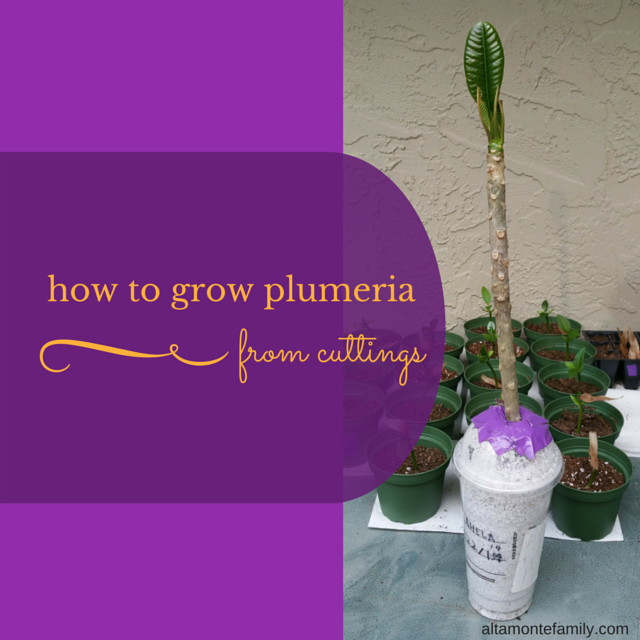
The above photo shows a cutting (the one in the foreground) that we got from The Exotic Plumeria in Seffner, Florida. The attendant simply used the most basic looking shears to cut a branch off of one of their many Kahela cultivars. As soon as we arrived home, we set the cutting on a dry paper towel in a shaded area and waited approximately 14 days for it to “heal”. We then followed the above 7 steps on how to root plumeria from cuttings (the easy way). It’s important to note that some cuttings may take longer to develop roots than others. In our case, this Kahela cutting took the longest to take root (it took approximately 2 months). If you’re wondering about the other plants in the background (above photo), they’re our little plumeria seedlings! These seedlings took only 5 days to make roots!
A Note About Saving Dying Plumeria Plants
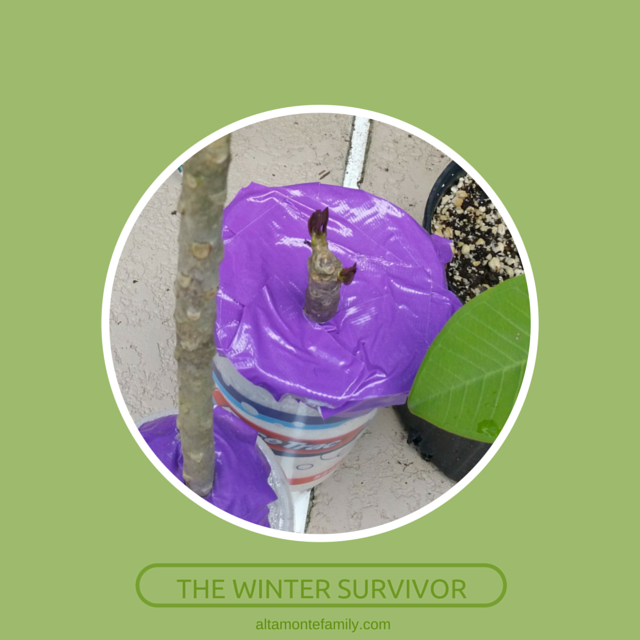
If you have any dying plumeria plants (like we did during the winter), cut off the dead parts and salvage any part of any branch that still looks like it has a fighting chance (as long as it doesn’t appear to be infected by some plant disease that may in turn infect your other good plants). We rescued 3 inches from a big, dying plant, and applied the same rooting method that we shared above. The photo below shows the results, only 3 weeks later!

What kind of easy methods do you use to root plumeria cuttings? Do you have any children who also enjoy gardening and raising plumeria? We’d love to hear about your plumeria gardening adventures!
May God bless your garden with plenty!
Disclosure: As of the time of writing this post, AltamonteFamily.com is by no means affiliated with any of the companies or organizations mentioned in this article. AltamonteFamily.com has not been compensated in any way nor has AltamonteFamily.com been influenced to write about these products. This post is a result of the personal observations and independent research of members of AltamonteFamily.com. All opinions solely belong to AltamonteFamily.com.
Leave a Reply